Visualization
Some large datasets may on occasion need to be visualized in place, on the cluster. For these situations, the user has several options which are detailed below.
SSH
The most common approach to visualization is by connecting to the server with a flag to set the X11 forwarding details. The most common ones are:
ssh -X someone@something.ip.address # ForwardX11
ssh -Y someone@something.ip.address # ForwardX11Trusted
However, a more practically useful method is to modify the ssh configuration file itself. The following snippet can be added:
Host *
  ForwardAgent yes
  ForwardX11 yes
  ForwardX11Trusted yes
  XAuthLocation /opt/X11/bin/xauth # For a Mac with XQuartz
For Linux (and Windows with WSL 2) machines, which xauth will provide the path for the XAuthLocation variable. Now the user is free to connect directly:
ssh someone@something.ip.address # Reads the ssh configuration
A quick test to see if X forwarding is working is to type
xclock
which should open up a small clock GUI showing the local time.
Using PuTTY
PuTTY also offers a visualization method when connecting to the server. This is done by using the PuTTY application and another software called VcXsrv which can be found here, though other X server software could also be used but we will be using VcXsrv in this case.
Using XLaunch
After you installed VcXsrv, find the application called 'XLaunch' and run it. The following window should pop up.
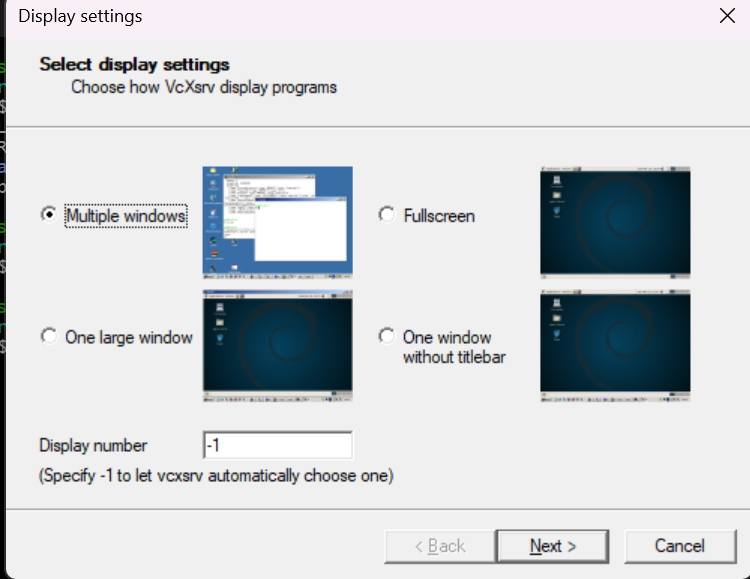
Choose Multiple windows and click on Next > and a new page will appear that goes through the Session Type.

On the Session Type choose Start no client and click on Next and you should be prompted to the Additional parameters section.
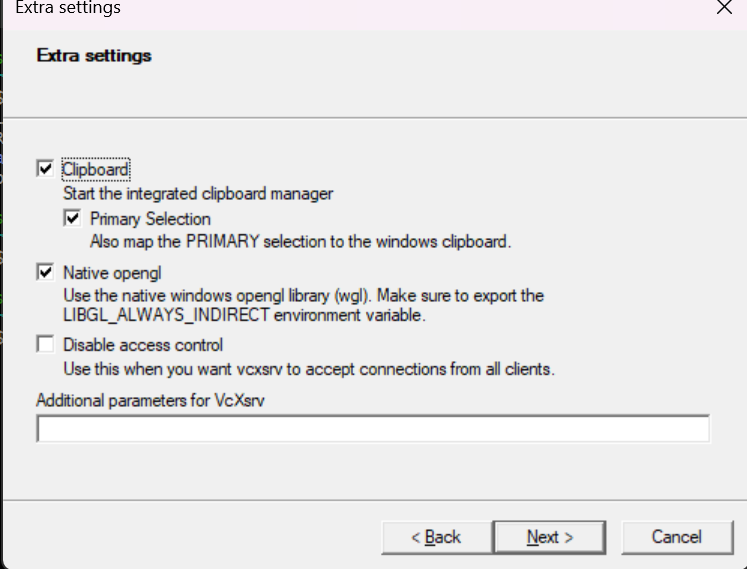
There choose only the Clipboard option and press Next > and that will move you to Finish Configuration
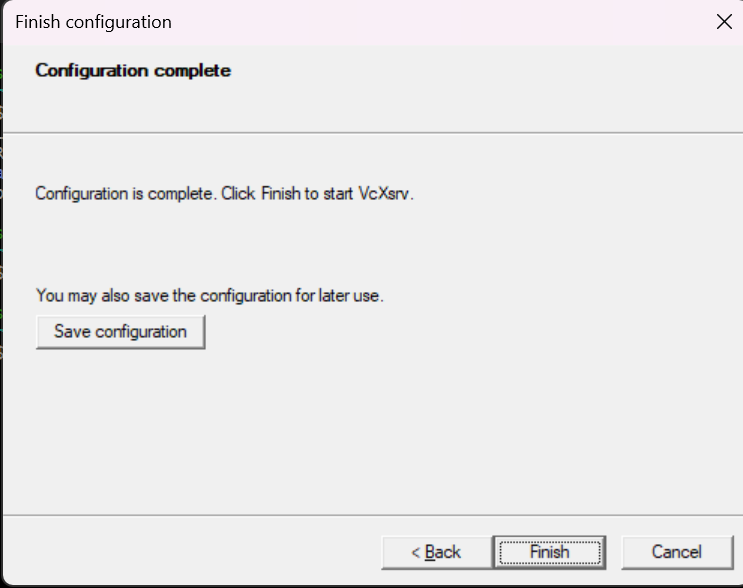
On that screen you only need to click on Finish
Configuring PuTTY for X11
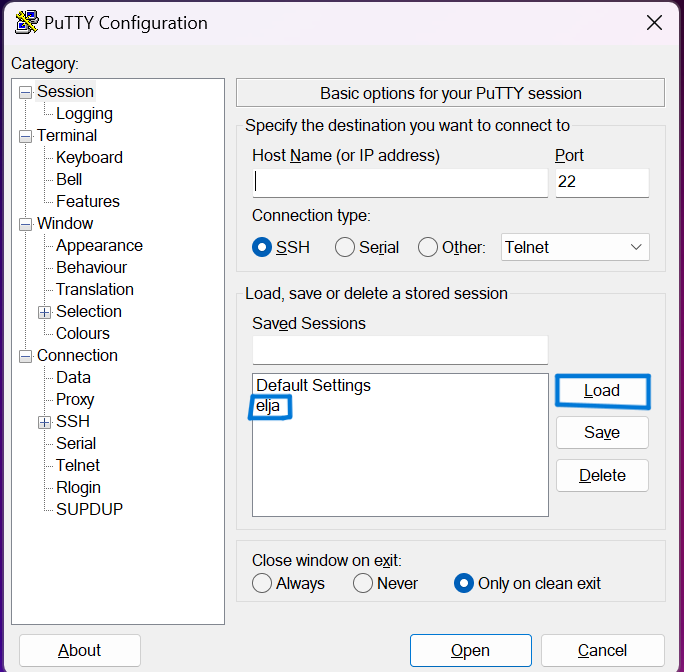
First step would be to open PuTTY and load a session. To do this you should automatically be moved to the Session section once you run PuTTY. Then click on the session and then the Load button.
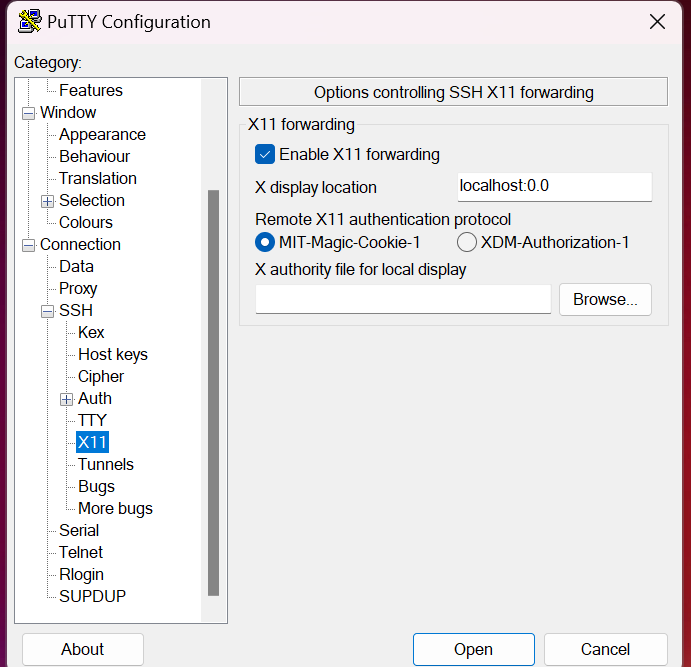
Go to Connection -> SSH -> X11 and choose Enable X11 Forwarding and set the X display location to localhost:0.0 as well as selecting MIT-Magic-Cookie-1 in Remote X11 authentication protocol. If you've done everything correctly it should look something like this:
Check for Result
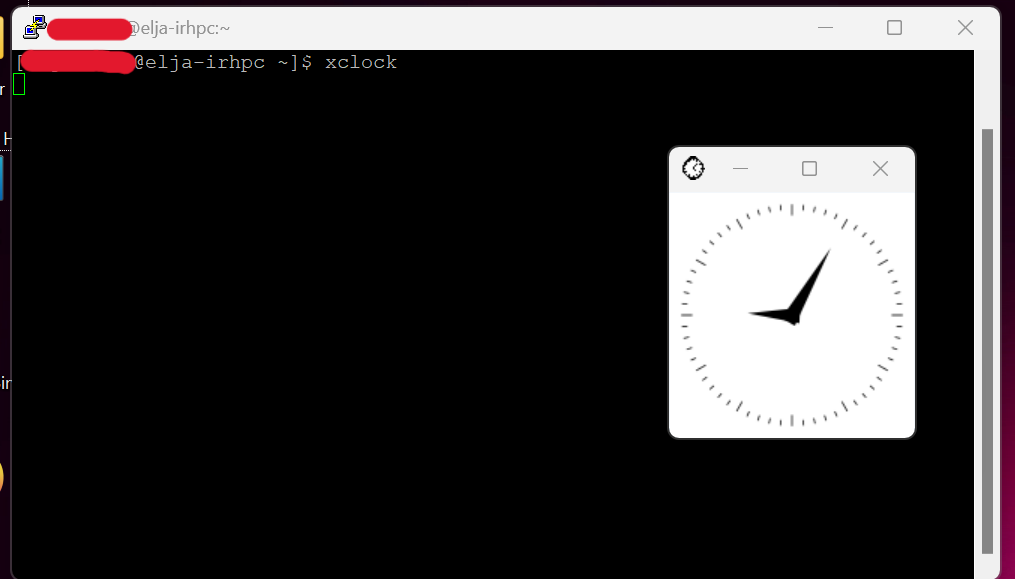
Once you've set up X11 and connected to elja the next step is to check whether it succeeded. To do this simply type in the command line on elja xclock. This command should make a clock appear on your screen like the screenshot shows here below.
Using VScode
Many users use VSCode to connect to Elja but it might be a difficult process to enable visualization through VSCode. Here are instructions to enable X forwarding (visualization)
Step 1
First set up XLaunch to enable X forwarding. You can follow the instructions in this chapter here to complete this step.
Step 2
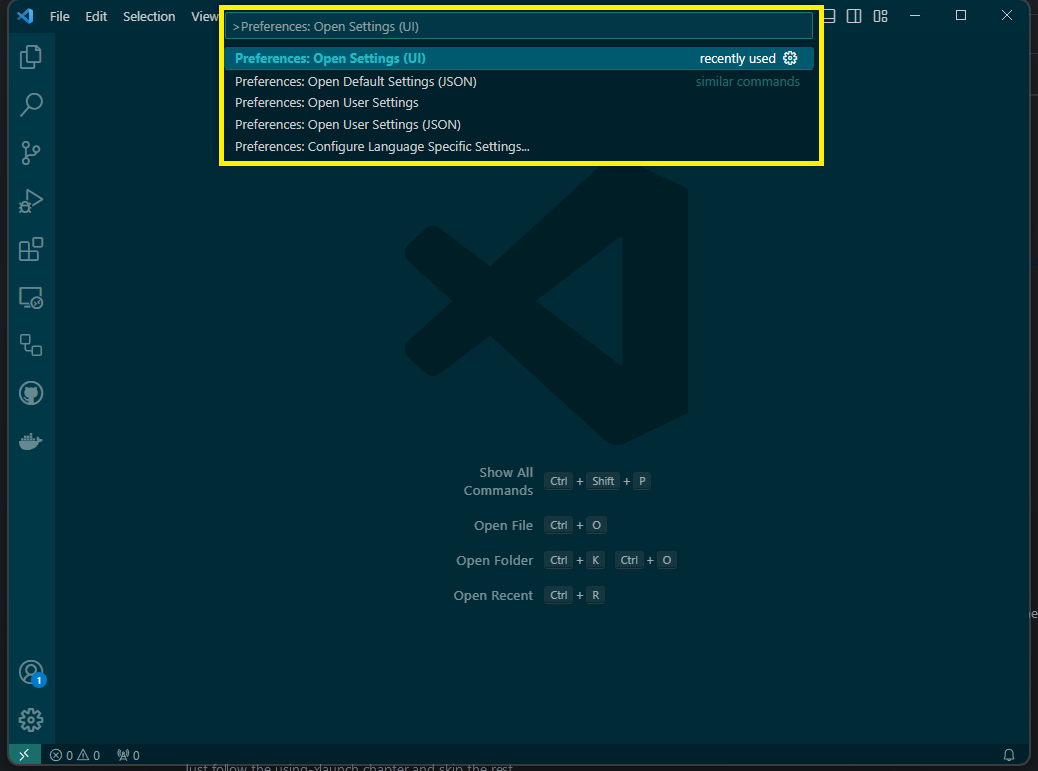
Open VSCode and click on the F1 button and type Preferences: Open Settings (UI)
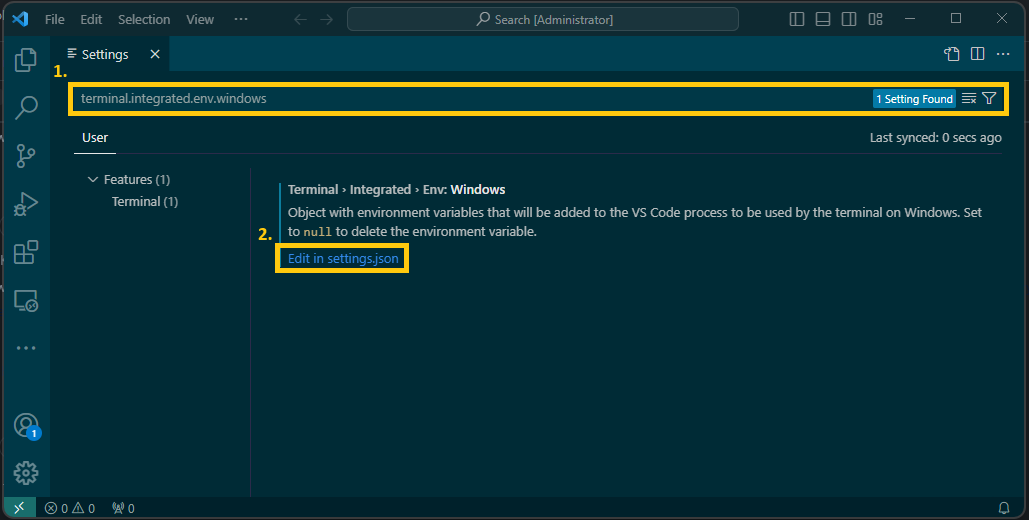
Step 3
Now search for terminal.integrated.env.windows and click on Edit in settings.json like shown in the picture below.
Step 4
After step 3 VSCode should open a settings.json file. In there add the following:
    "terminal.integrated.env.windows": {
        "DISPLAY": "127.0.0.1:0.0"
    },
then save and exit.
Step 5
In your SSH configuration, varying but mostly common to be in the location .ssh/config file, add in there the following:
Host TestX11 #changeable
  HostName elja.hi.is
  User <YOUR_USERNAME>
  ForwardAgent yes
  ForwardX11 yes
  ForwardX11Trusted yes
  IdentityFile <location of private key>
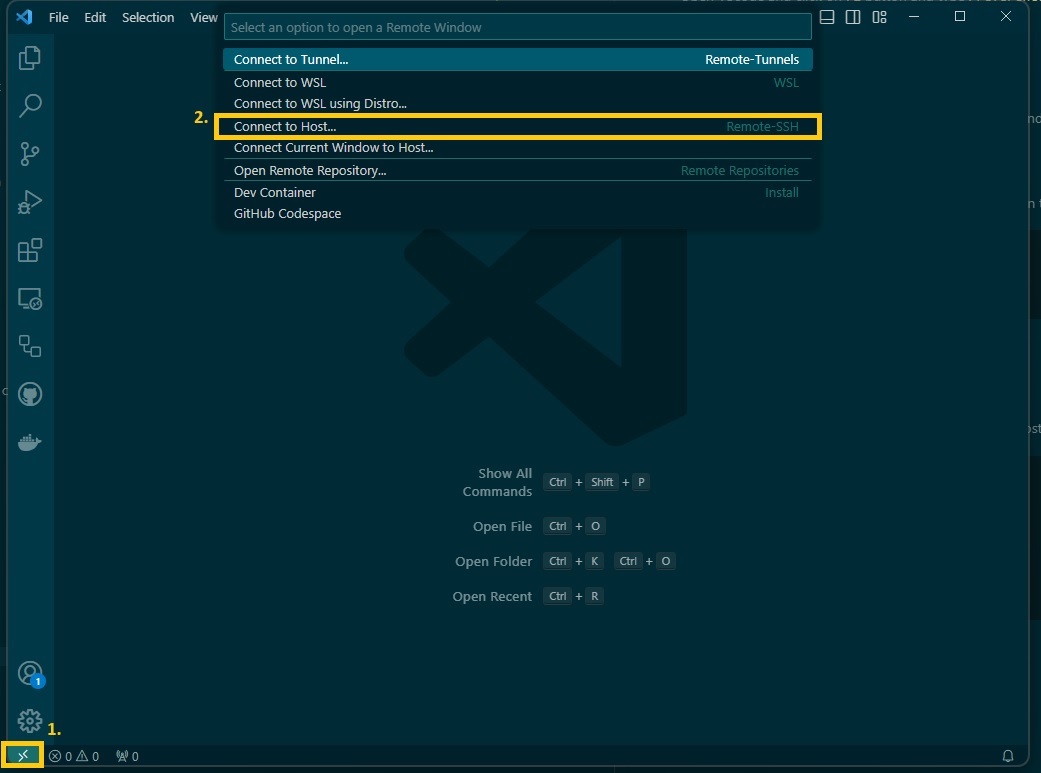
Step 6
This step requires the user to have the extension Remote-SSH.
Connect to Elja by clicking on the green button at the bottom corner and click on Connect to Host... like the following picture shows.
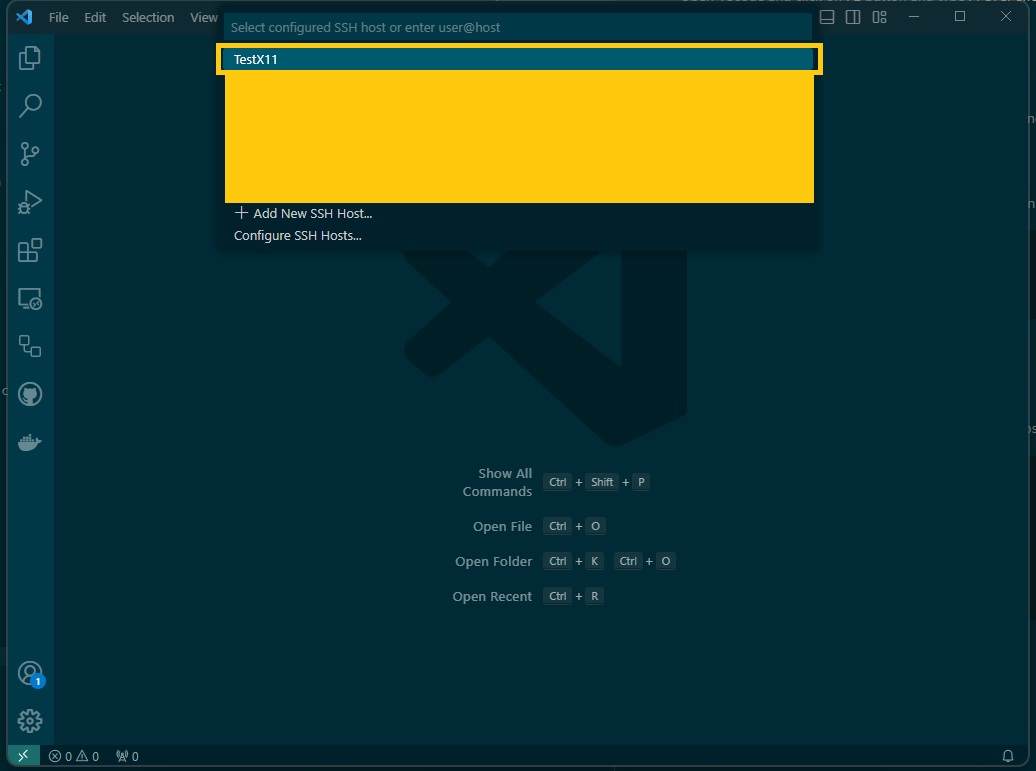
and then like in the next picture click on the name of the 'HOST', in this case TestX11 you want to connect to.
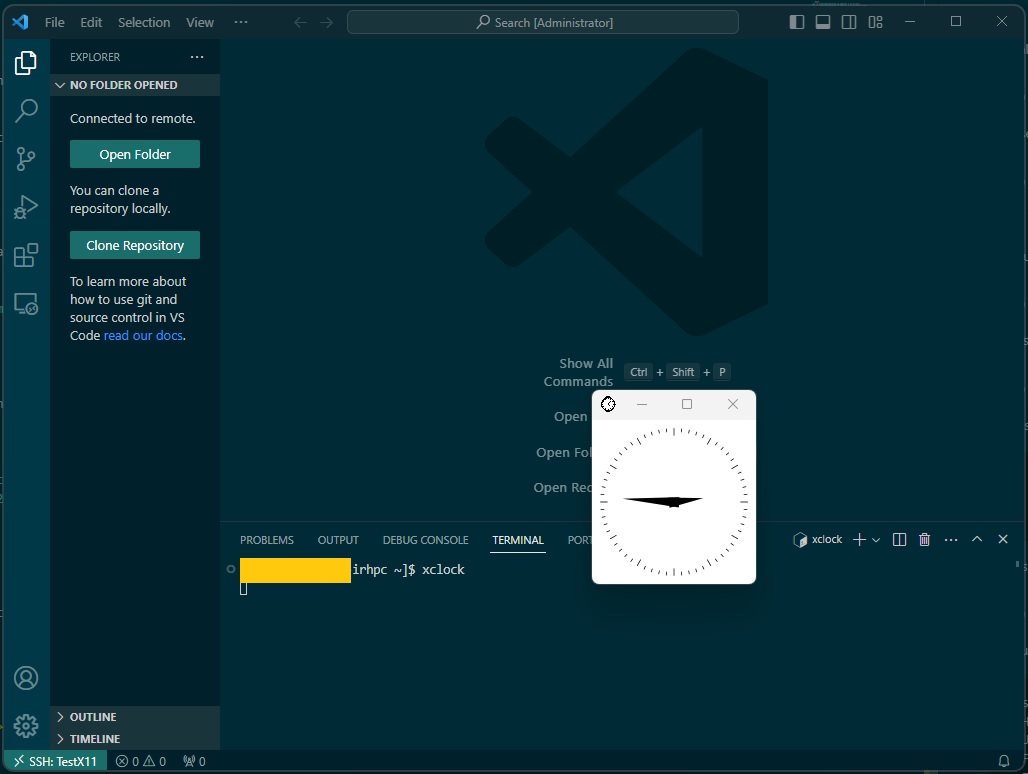
Step 7
Once you've managed to connect to Elja you can check if the X forwarding is working by typing into the terminal xclock like this picture shows: